

Automotive LED bulb testing
Test equipment and methodology
Photometry and flicker test
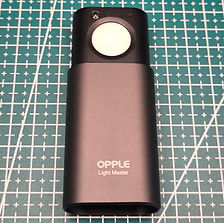
The photometry test was performed using Opple Light Master 4 (Amazon).
This device is capable of measuring a number of important light characteristics: Lux, Ra, R9, color temperature, CIE x and y coordinates, duv value, and flickering. All these characteristics were measured for each test sample.
Photometry parameters:
-
Lumen - the total amount of light emitted by a source.
-
Lux - illuminance, or the amount of light falling on a surface. 1 lux equals 1 lumen per square meter.
-
CRI Ra - color rendering index. It is a quantitative measure of the ability of a light source to reproduce the color of different objects faithfully in comparison with an ideal or natural light source. The scale varies from zero to 100. It is considered that for applications where the correct display of color tones is important (shop window lighting, art and design workshops, photo studio, kitchens), the Ra value should be more than 90, ideally >95.
-
CRI R9 - ability to emit red light (>600 nm). It is a very important parameter, especially in photography, kitchens, and medical facilities, which has a great influence on the correct display of skin tone. What is CRI R9 and why is it Important?
-
CIE X and Y coordinates and duv value - The coordinates represent color from the CIE 1931 color space, while duv describes its distance from the color emitted by the black body at a certain color temperature. Here you can find more information about it.
Flicker parameters:
-
Flicker index - considers the area of the waveform above and below the average light output.
-
Modulation depth (flicker percent) is the measure of the maximum light vs. the minimum light in a cycle.
-
Frequency - the majority of humans do not detect flicker frequency >90Hz, but unconsciously, through optic nerves, light frequency <400Hz has an impact on the human body.
-
Risk (IEEE PAR1789) - an integrated risk assessment based on the parameters above.
-
More information about flicker and its impact on humans can be found in this article.
You may also find useful information from European standard EN 12464-1 regarding illumination intensity and Ra parameters recommended for different working environments.
Is the brightness test accurate?
To collect the emitted light and reduce the effect of the emission angle, I built a test stand using a mirrored sphere with an opening for the photometer.
In order to get accurate brightness measurement results as precise as possible, it was necessary to calibrate the test stand.
For calibration, I used a Nichia 519A 4000K LED with known, stable characteristics. Its approximate output is 635 lumens at 2A, based on measurements reported by several sources.
I then measured 21000 lux with the Opple LM4. This gives a Lux/Lumen conversion factor of 33.07 for my test stand, which I use to estimate the lumen output of the other LEDs.
LED temperature measurement
To perform an LED temperature test, the infrared camera Xinfrared InfiRay P2 Pro (Amazon) is used.
Making temperature tests is important because high-power LEDs should be protected by a heatsink in order to dissipate excessive heat, which is harmful to LEDs.
It's good practice to keep a majority of commercial LED under 60°C if possible, but not more than 85°C as it may reduce LED lifespan. Some LEDs can tolerate up to 150°C, but we shouldn't assume that heat tolerance level in mass-market LEDs.
How much current should an LED receive?
An LED is a current-driven semiconductor device. Its I-V characteristic is nonlinear and approximately exponential: once forward conduction begins, a small increase in voltage can cause a large increase in current. The LED must therefore be operated with current limiting.
If you are working with an LED strip or a complete LED bulb, it already contains either current-limiting resistors or current-regulation circuitry, so you only need to supply the specified voltage.
But if you need to work with a single LED, then you need to know how much current you have to limit to power your LED. Usually, this information is provided by the manufacturer in the datasheet or on the product page, but it's not always available, or you have a random LED, so sometimes you have to deal with an LED without such information.
What can you do?
If the LED specifications are unknown, do not connect it directly to a voltage source without current limiting to determine its operating current. Use a current-limited bench supply or a sufficiently large series resistor, start at a low current, and increase it gradually while monitoring forward voltage, brightness, and temperature.
Without manufacturer data, this can establish only a conservative operating point, not a guaranteed maximum current.
The forward voltage value depends on the emitting light wavelength (emitting color) of an LED. Here is the reference for the LED without phosphor coating:
-
Infrared (IR) - 1.5V
-
Red/Orange/Yellow - 1.8V
-
Green - 2V
-
White/Blue/Ultraviolet (UV) - 3.2V
Sometimes you might see an LED chip coated with a yellow surface. This is a phosphor (luminophore) coating on top of a blue LED because blue LED is the most energy-efficient LED, and phosphor re-emits light in other wavelengths, giving a richer light spectrum. The majority of LEDs that are used as a source of light look like that.
An LED can withstand bigger voltage (and current), but you should avoid it as the LED becomes less energy-efficient, generates more heat at its maximum, and degrades quickly. You might even consider reducing the current in order to reach a higher Lumen/Watt ratio and prolong the LED lifespan.
Once you decide which electrical current for your LED is optimal (taking into account its brightness and efficiency), you will need either to set the defined current limit on your LED power supply or build a circuit installing a current-limiting resistor in series with the LED. You can use this online calculator to define the resistor value.
It is worth noting that you can power your LED by any voltage with the correctly chosen resistor, however the bigger the difference between the forward voltage and power supply voltage is, the overall circuit efficiency will be lower, because more electrical power will be dissipated on the resistor.
I test at different voltages and corresponding currents so you can compare LED efficiency and brightness under different conditions.
What is a COB LED?
A COB LED (or chip-on-board LED) is a single device with many LED chips mounted on a thermally efficient substrate placed below a uniform phosphor coating. As practice shows, such assemblies are less energy-efficient compared to individual LEDs, but give more uniform lighting and reduce the effect of a point light source, which is reflected in the design.

Observation stand with mirror spherical

Observation stand under mirror spherical

Nichia 519A 4000K


Issues when using automotive LED bulbs
Some car owners may encounter a problem when replacing conventional incandescent (halogen) bulbs with LED bulbs. The problem is that the LED bulb either does not turn on or blinks. At the same time, some cars with this problem may show an error on the dashboard that the bulb does not work.
This problem occurs in some modern cars that have a bulb-out detection system.
The on-board computer of such cars measures the resistance of the area where the bulb should be installed, and if the resistance is significantly higher than that of an incandescent bulb, or no current is flowing at all, the computer registers the problem, shows an error and interrupts the current supply to the bulb. The difference in resistance value arises because an incandescent bulb draws approximately 2-7 times as much current as an LED bulb, and the value of current consumption depends inversely on its resistance (the higher the resistance, the less current flows).
At the same time, cars that do not have such a function (determination of the burned-out lamp) perfectly and without any problems use LED lamps instead of classic incandescent lamps (I confirm by my own experience).
If your car has such a problem, there are several ways to solve it:
-
Disable the detection of burnt-out bulbs in the on-board computer (the most reliable way, but requires the participation of an electrician)
-
Install a load resistor in parallel with the LED bulb, connecting it between the power wire and ground. This increases the load current and helps the bulb-out monitoring system emulate the electrical load of an incandescent bulb. The resistor must have a sufficient power rating, typically 50W with a resistance of about 6-10Ohm. It has no polarity and is connected in parallel with the bulb circuit. Because it can become very hot, mount it securely to a metal surface away from plastic and other heat-sensitive components. There are also adapter kits with which you don't have to cut the wires, they are inserted between the base and the bulb. In general, solving the problem by installing a resistor (or an adapter kit with a resistor) is not a guarantee that the bulb will work correctly in your car because some cars measure resistance quite accurately and a small deviation may be considered an error, and some deviation is unavoidable because the resistance of LED bulbs varies, but in most cases, the problem is solved this way.
-
Some LED bulbs include built-in CAN Bus error-canceling circuitry. However, this does not guarantee compatibility with every vehicle because both the monitoring systems and the circuitry used in LED bulbs vary.
Some cars may have a problem with signal lights and DRLs (daytime running lights) that use single-pin 21W bulbs instead of dual-pin 21/5W bulbs, and PWM dimming is used to control the brightness. PWM (Pulse Width Modulation) is the interruption of the power supply to the bulb at a specific frequency and duration, which allows for adjustment of the visible brightness and power consumption of the bulb. Some LED bulbs cannot operate correctly in this mode, resulting in noticeable flickering.
Solution: there are adapters that smooth out the PWM effect and eliminate flicker in LED bulbs by using high-capacitance capacitors, but this approach, while eliminating flicker, does not allow dimming in the way a car tries to do. Often such adapters come with a built-in resistor. A better solution may be to select a bulb designed to work correctly with PWM dimming.
Conclusion: if you have not used LED bulbs before (interior lighting, license plate lighting, signal lights, daytime running lights, low/high beam), it makes sense to try a bulb from a store that will allow you to return it, in case the bulb will not work on your car or you will not be able to solve the problem of compatibility with LED bulbs. The same applies to the use of adapters and resistors.
I want to note once again that the described problems are individual problems of certain car models. On my 2008 Peugeot 308, the interior lights, daytime running lights, and signal LED bulbs work correctly without additional resistors.

12V automotive signal/marker bulb test (64 bulbs)
This test will come in handy if you are planning to replace standard halogen lights in your car with automotive LED bulbs with the same socket type. Such a replacement makes sense if you want to either reduce the car's energy consumption (energy consumption is reduced by 4 or more times at the same brightness level) and/or increase the brightness of the lighting.
All test details that were performed in this LED category can be found in this Google document ("Car Signal/DRL Light" sheet).
The testing is ongoing, so the light list and recommendations will be updated over time by adding new test subjects.
All lamps for further testing were purchased by me personally with my own money.
Types of tested bulbs
This test category involves lamps used as signal or marker lights:
- Turn Signals/Indicators
- Brake/Tail lights
- Daytime Running Lights (DRLs)
- Reverse Lights
The most common types of socket (plug) for these lights are:
-
P21/5W, (socket: 1157, BAY15D, BA15D) - 2 contacts (high/low power)
-
P21W (white), PY21W (yellow),(socket: 1156, BA15S, BAU15S) - 1 contact
-
W21/5W, (socket: T20, 7443, 7443 SRCK, W3x16q), - 2 contacts (high/low power)
-
W21W, WY21W (socket: T20, 7440, W3x16d) - 1 contact
-
P27/5W (socket: 3157, T25, W25x16q) - 2 contacts (high/low power)
-
P27W (socket 3156, T25, W25x16d) - 1 contact
Some of the LED light makers use the same light head, but different socket types, or change the color of the LED installed (white, yellow, red), but there is no difference in the performance of a light bulb with different socket types. The color of the light, however, may have some influence on brightness.
In my tests, I mostly focused on P21/5W type bulbs in this car lights category.
Primary color definition
Most of the tested bulbs are white, although some are yellow or red. When describing a bulb's color, the primary color is the key parameter; if the exact shade matters, refer to the measured color temperature. Turn-signal bulbs should primarily emit yellow light, while some brake/tail-light applications require bright red light unless the lamp housing itself is red and uses a white or clear bulb. This primary color is also defined and noted in the Google document.
Types of measurements performed for each bulb
-
Brightness measurements and power consumption were performed for 4 different voltages:
-
14V (car engine on),
-
13V (for the sake of the test),
-
12V (basis),
-
11V (for the sake of the test),
-
I additionally measured a starting voltage (the minimum voltage that lights the LED)
-
-
The photometry test and flicker measurements were performed at 14V (car engine on), as it is the main operational voltage for the lights.
-
LED temperature test. There are 3 measurements were performed:
-
10 seconds - for the sake of the test.
-
30 seconds - to check whether an LED is suitable to be used as a signal light within the 85°C threshold.
-
60 seconds - to check if the LED can remain within the temperature limit of 85°C in order to be used as a DRL (Daytime Running Light).
-
If the temperature is within limits, I did an optional 90-second temperature test.
-
If a bulb has a glass or plastic cover, it's impossible to correctly measure the LED chip temperature. In this case, I measured the hottest part of the bulb, usually its housing, and its temperature is usually 25-30°C lower than the LED chip. With a plastic housing, the LED chip temperature may be even higher because plastic dissipates heat poorly.
-
-
Most of my tests are done for dual-contact bulbs (high/low power), P21/5W. The power consumption difference between high/low power was noted in the additional parameters section in the Google document - "Car Signal/DRL Light" sheet. The brightness and photometry tests are performed for the high-power mode.
Other LED light quality and recommendations approach:
-
Some bulbs have an aluminum shell/housing, which is a very good feature because it is used as a heatsink/radiator for heat dissipation and prolongs LED lifespan.
-
Some of the bulbs are more powerful than others. If a powerful, bright bulb does not have a very good heatsink, it quickly overheats, brightness drops, and the LED degrades quickly. You may install high-power hot bulbs as brake or turn lights, as they light occasionally and may cool down between flashes, but you should avoid using them as DRLs (Daytime Running Lights).
-
Try not to rely on nominal power (watts) written on an AliExpress product page, as most of the time (with very few exceptions) it's not correct, however, you can check the real light bulb power, temperature, energy efficiency, and many other parameters based on my measurements.
-
My final recommendation was given taking into account a few parameters:
-
Structural design/quality, general impression
-
Heat dissipation measurements
-
Energy efficiency
-
Level of brightness and its stability. Brightness must be at least 75% of that of a conventional halogen bulb.
-
LED lights I recommend in this category among 64 test subjects:
-
CSL_18 - Very good light, good brightness (89% of the halogen bulb's brightness), the temperature is within limits, impressive energy efficiency, power 4.7W. Can be used as DRL. Price - 3USD per bulb.
-
CSL_25 - Very good light! Stable, good brightness (76% of the halogen bulb's brightness), stable, incredibly low temperature, good ALU heatsink, focused beam with lens, good packaging, power 5.9Watt. Best for DRL. Price - 3.4USD per bulb.
-
CSL_29 (Alternative link) - Very good stable brightness (103% of the halogen bulb's brightness), good heat dissipation (ALU heatsink), good energy efficiency, power 6Watt. Suitable for DRL. Price - 3.8USD per bulb.
-
CSL_32 (Alternative link) - Good packaging, solid structure, ALU heatsink, very bright (156% of the halogen bulb's brightness), power 9.8Watt, could be used as DRL. Price - 3.6USD per bulb.
-
CSL_34 (Alternative link) - Solid structure, ALU heatsink, stable, very high brightness (171% of the halogen bulb's brightness), very good power efficiency, power 9.6Watt. Could be used as DRL. Price - 5.2USD per bulb.
-
CSL_46 - excellent aluminum construction, consistently high brightness (126% of the halogen bulb's brightness) across different voltages, temperature within acceptable limits (up to 80°C after 90 seconds), suitable for daytime running lights (DRLs). High energy efficiency. Power:7.1W Price: 3.7USD per bulb.
-
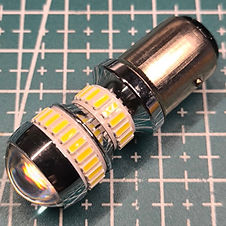
CSL_48 (Alternative link) - Solid structure, Aluminum shell, good brightness (79% of the halogen bulb's brightness), Perfect heat dissipation (62°C max after 90 seconds), suitable for DRL. Good power efficiency. Power:5.5W Price: 6.3USD per bulb.
-
CSL_53 (Alternative link) - Compact size, excellent brightness (105% of the halogen bulb's brightness), acceptable temperature (68°C max after 90 seconds, radiator measurement), suitable for DRL. Impressive power efficiency. Power:6.1W Price: 6.3USD per bulb.
-
CSL_62 (Alternative link) - superb brightness (139% of the halogen bulb's brightness), good heat dissipation (76°C max after 90 seconds, LED chips measurement), suitable for DRL. Good power efficiency. Power:8.6W Price: 3.5USD per bulb.


Halogen P21/5W (CSL_01)

CSL_05

CSL_09

CSL_13

CSL_17R

CSL_21

CSL_25

CSL_29

CSL_02

CSL_06

CSL_10

CSL_14
CSL_18


CSL_22R

CSL_26

CSL_30

CSL_03

CSL_07

CSL_11

CSL_15

CSL_19Y

CSL_23

CSL_27

CSL_31

CSL_04

CSL_08

CSL_12

CSL_16

CSL_20

CSL_24

CSL_28

CSL_32

CSL_33

CSL_37

CSL_41

CSL_45

CSL_34

CSL_38

CSL_42

CSL_46

CSL_35

CSL_39

CSL_43

CSL_47

CSL_36

CSL_40

CSL_44
CSL_48

CSL_49

CSL_50

CSL_51

CSL_52

CSL_53

CSL_54

CSL_55

CSL_56

CSL_57

CSL_58

CSL_59

CSL_60
CSL_61

CSL_62


CSL_63

CSL_64